Wednesday, July 8, 2020

Ansible - convert yaml file to json

Using the Ansible filters from_yaml and to_json it is easy to construct a task to convert a yaml file to JSON.

Here is the Ansible playbook yaml_to_json.yml (in a real world example the names of the files would probably be parameterized).

---

- hosts: localhost

  tasks:
    - shell: cat my.yaml
      register: result

    - set_fact:
        myvar: "{{ result.stdout | from_yaml | to_json }}"

    - copy:
        content: "{{ myvar }}"
        dest:    my.json

Here is an example of a yaml input file which contains some special characters, lists, strings, numbers etc.

---

xx:
 - a:
 - b:
     A: aadf7{fdfd"öög
     B: [ 'asdfadsf*5%@@@"masdf' , 123456 ]

yy:
 n:
   C: 'AAdf7{fdfd"öög'
   D: [ 'ASdfadsf*5%@@@"masdf' , 789.56 ]
 m:

When run via ansible-playbook yaml_to_json.yml the JSON output file below (run via jq .) is generated.

{
  "yy": {
    "m": null,
    "n": {
      "C": "AAdf7{fdfd\"\\u00f6\\u00f6g",
      "D": [
        "ASdfadsf*5%@@@\"masdf",
        789.56
      ]
    }
  },
  "xx": [
    {
      "a": null
    },
    {
      "b": {
        "A": "aadf7{fdfd\"\\u00f6\\u00f6g",
        "B": [
          "asdfadsf*5%@@@\"masdf",
          123456
        ]
      }
    }
  ]
}
Note how lists and dictionaries and special characters are put into the resp. JSON format.

Also note that I am using the Ansible copy module. A shell: echo "{{ myvar }}" > my.json does not work since it does not take care of the correct quote and special characters subsitutions.

Friday, March 20, 2020

Different 'exit' behaviour between bash and Korn shell in command pipelines

When running command pipelines it is sometimes convenient to break out of a sub process and exit a shell script.

There are differences though between different types of shell and I want to show this behaviour and its consequences , in particular how common expectations might be met or not, and also suggest solutions.

Here is my example. It is a simple script: a command pipeline consisting of a printf (printing two lines) followed by a while, wrapped by a starting and closing echo

echo Before pipeline
printf "text1\ntext2\n" | while read line ; do
  # Do something useful with 'line'
  echo $line
done
echo After pipeline
and the output - with whichever shell - is
Before pipeline
text1
text2
After pipeline

Now let's modify this script and add an exit into the while loop so that it looks like this

echo Before pipeline
printf "text1\ntext2\n" | while read line ; do
  # Do something useful with 'line'
  echo $line
  exit 1
done
echo After pipeline
As artificial as this example might look you can simply assume that there are more complex things happening in the while loop and under certain conditions one might want to exit the loop.

Here are the results for bash and Korn shell ksh

bash
#!/bin/bash
ksh
#!/bin/ksh
Before pipeline
text1
After pipeline
Before pipeline
text1
Exit code: 0 Exit code: 1
Common behaviour: both shells leave the loop and neither prints the second line 'text2'
bash continues with the commands after the while loop
(and exits with the result of the last 'echo' command)
ksh exits the whole script

While the behaviour of ksh seems more natural (exit means exit everything) the bash behaviour can be explained when considering that the while loop is a sub shell with its own scope as if it would be a separate shell script. Exiting the loop means to return to the parent. This also means that the parent script can capture this exit code and thus the solution is a check after the loop.

echo Before pipeline
printf "text1\ntext2\n" | while read line ; do
  # Do something useful with 'line'
  echo $line
  exit 1
done
[ $? -ne 0 ] && echo ERROR && exit 2
echo After pipeline
The result for bash: exit code 2 and the output
Before pipeline
text1
ERROR
The exit code check line is meaningless for ksh since it will never be reached.

I've seen plenty of bash scripts with similar constructs where the author coded a quick 'exit' line into the while loop but forgetting to check the result, probably assuming the ksh behaviour.

Tuesday, February 4, 2020

Circular shift of lists in python

Scenario

Assume I have a list in python
a = [ -2, -1, 0, 1, 2 ]
(an admittedly simple list here with integer numbers).
I want to shift these entries in the list to the left or right so that the entries moving out of the list enter the list again at the other end e.g. I want to shift 2 to the left to get this list:
[0, 1, 2, -2, -1]

Solutions

There are solutions using numpy but I want to present another easy solution just using slices.
shift = 2
x = a[shift:]       # This is [ 0, 1, 2 ]
y = a[:shift]       # This is [ -2, -1 ]
print( x + y )

[0, 1, 2, -2, -1]
I am
  • setting my shift value to 2
  • creating a slice from index 2 to the end of the list
  • creating a slice from the beginning of the list until index - 1
  • adding the two slices to get the shifted result

    This also works for negative shift values (shift to the right) which is a particularily nice feature of the pythong [:] operator.

    shift = -1
    x = a[shift:]       # This is [ 2 ]
    y = a[:shift]       # This is [ -2, -1, 0, 1 ]
    print( x + y ) 
    
    [2, -2, -1, 0, 1]
    

    Add-on: calculate the new index of a shifted element

    Starting with
    a = [ -2, -1, 0, 1, 2 ]
    
    the element -2 has index 0. The shift 2 to the left result
    [0, 1, 2, -2, -1]
    
    puts element -2 at index 3.

    How can I calculate that?

    
    def index_after_shift( old_index, shift ):
      return ( old_index - shift ) % len(a) 
    
    # Examples
    for shift in [2, -1 , 6 ]:
      for ind in [ 0,1,2,3,4]:
        print( ind, shift, index_after_shift( ind, shift ) )
      print()
    
    0 2 3
    1 2 4
    2 2 0
    3 2 1
    4 2 2
    
    0 -1 1
    1 -1 2
    2 -1 3
    3 -1 4
    4 -1 0
    
    0 6 4
    1 6 0
    2 6 1
    3 6 2
    4 6 3
    
    The function index_after_shift calculates the new index.
    A shift 2 to the left i.e. shift = 2 means that we subtract 2 from the current index to get to the new one therefore old_index - shift. This is easily understandable for indexes 2, 3, 4, ... which will become 0, 1, 2, ....
    What do we do with smaller indexes?>
    Here we are using the modulo function which will do the necessary calculation for us e.g.
    shift = 2
    old_index = 1
    # length of a is 5
    ( old_index - shift ) % len(a)
    # = ( 1 - 2 ) % 5
    # = -1 % 5
    # = 4
    
    The modulo has converted the negative number resulting from the subtraction into a positive one.

    shift to the right means we have to add something to the index to get to our new index (since the variable shift is negative for right shifts we subtract a negative number in the function which results in the addition of a positive number).

  • Thursday, January 30, 2020

    Modulo operation in programming languages - differently implemented

    Many programming languages support an operation which they call modulo operator and which is often designated by the symbol
      %
    Often it is also referred to as the remainder after division.

    Only recently I found out that this operation does not behave as one might think. The results differ depending on which programming language you are using.

    Before I go into the details I would like to illustrate the difference which shows when using negative numbers.

    Example

    I want to calculate these two expressions:
     27 % 10
    -27 % 10
    
    The result for the second expression will be different depending on the programming language.

    C

    When you are using this statement in C
    printf("%d  %d\n", 17 % 10, -17 % 10 );
    
    you get
    7  -7
    

    Python

    When you are using this statement in python
    print( '{0}  {1}'.format( 17 % 10,  -17 % 10 ) )
    
    you get
    7  3
    

    Explanation

    modulo as remainder by division

    Some programming languages implement modulo as a remainder of division operation. Thus -27 % 10 results in the leftover of -27 when you take away the maximum multiple of 10 , so you are left with -7.

    modulo as mathematically correct number

    Other programming languages implement modulo as correct in the mathematical sense.
    Mathematically modulo is defined as the number which needs to be added to a multiple of the divisor to get to the original.
    x = m % n
    There must be a number 'a' so that
    a * n + x = m
    and this condition should be met:
    0 <= x < n
    
    In our case:
    x = 3
    a = -2
    =>
    a * 10 + x = -2 * 10 + 3 = -17
    

    Conclusion

    Since I am not a programming languages expert I can only refer to the interesting Wikipedia article about modulo operations.
    This subject is worth knowing if any of your programming efforts involve some number operations.
    My personal "watch out" topic is awk programming where the behaviour is non-mathematical like C.

    Wednesday, November 20, 2019

    Ansible - dictionaries vs. lists

    When working with more complex variables in Ansible (often based on yaml input files) you always have to be aware whether the variable is a list or a dictionary. Applicable filters and methods differ and can lead to errors or unexpected results.

    Example input yaml

    Here I am defining two variables x and y with some sub elements.
    At first glance there doesn't seem to be much difference and if you are about to design a yaml for whatever purpose both solutions might seem interchangeable. The difference lies in its usage which we will see below.
    x:
      b1:
        c1: 1
        c2: "aaa"
        c3:
      b2:
        c2: "bbb"
        c3: 5
    
    y:
      - b1:
          c1: 1
          c2: "aaa"
          c3:
      - b2:
          c2: "bbb"
          c3: 5
    
    Call the file dict.yml.

    How to check the variable type

    Lately there is a new filter in Ansible called type_debug which I find incredibly useful when in doubt.
    (unfortunately it was not available in Ansible 1.x, it would have saved me a lot of time)
    - hosts: localhost
    
      tasks:
      - include_vars: dict.yml
    
      - debug:
          msg: "x: {{x | type_debug}} / y: {{y |type_debug}}"
    
    will show
    TASK [debug] ************************************************************************************
    ok: [localhost] => {
        "msg": "x: dict / y: list"
    }
    
    i.e. I have a dictionary and a list.

    How to access the elements

    The elements of
  • a dictionary are accessed by name i.e. x['b1']
  • a list are accessed by position i.e. y[0]
    Something like x[0] or y['b1'] would generate a VARIABLE IS UNDEFINED.
    I also show the variable type of the sub elements.
    - hosts: localhost
    
      tasks:
      - include_vars: dict.yml
      
      - debug:
          msg: "{{x['b1'] | type_debug}}"
    
      - debug:
          var: x['b1']
    
      - debug:
          msg: "{{y[0] | type_debug}}"
    
      - debug:
          var: y[0]
    
    will show
    TASK [debug] ************************************************************************************
    ok: [localhost] => {
        "msg": "dict"
    }
    
    TASK [debug] ************************************************************************************
    ok: [localhost] => {
        "x['b1']": {
            "c1": 1,
            "c2": "aaa",
            "c3": null
        }
    }
    
    TASK [debug] ************************************************************************************
    ok: [localhost] => {
        "msg": "dict"
    }
    
    TASK [debug] ************************************************************************************
    ok: [localhost] => {
        "y[0]": {
            "b1": {
                "c1": 1,
                "c2": "aaa",
                "c3": null
            }
        }
    }
    
    
    You should also note the difference in the result. They are both dictionaries but in the x-case we get a simple dictionary with 3 elements whereas in the y-case we get a dictionary with one element b1 which a sub element of type dictionary.

    How to loop through sub elements

    You can loop easily through the elements by supplying the variable to with_items. The distinction is in what you get as an item. with_item provides
  • dictionary elements as strings and you need to access the sub elements via the {{x[item]}} method
  • list elements are dictionaries
    - hosts: localhost
    
      tasks:
      - include_vars: dict.yml
      
      - debug:
          msg: "{{item}}: {{item|type_debug}} / {{x[item]}}: {{x[item]|type_debug}}"
        with_items: "{{x}}"
    
      - debug:
          msg: "{{item}}: {{item|type_debug}}"
        with_items: "{{y}}"
    
    TASK [debug] ************************************************************************************
    ok: [localhost] => (item=b1) => {
        "msg": "b1: AnsibleUnsafeText / {u'c3': None, u'c2': u'aaa', u'c1': 1}: dict"
    }
    ok: [localhost] => (item=b2) => {
        "msg": "b2: AnsibleUnsafeText / {u'c3': 5, u'c2': u'bbb'}: dict"
    }
    
    TASK [debug] ************************************************************************************
    ok: [localhost] => (item={u'b1': {u'c3': None, u'c2': u'aaa', u'c1': 1}}) => {
        "msg": "{u'b1': {u'c3': None, u'c2': u'aaa', u'c1': 1}}: dict"
    }
    ok: [localhost] => (item={u'b2': {u'c3': 5, u'c2': u'bbb'}}) => {
        "msg": "{u'b2': {u'c3': 5, u'c2': u'bbb'}}: dict"
    }
    

    How to access the bottommost elements

    Say we want to access the value of c2 of b1 for both x and y. There is in both cases the bracket and the dot approach for the dictionary sub elements. In the y-case you need to supply the list position too but it also can be used with the dot approach.
    - hosts: localhost
    
      tasks:
      - include_vars: dict.yml
      
      - debug:
          var: x['b1']['c2']
    
      - debug:
          var: x.b1.c2
    
      - debug:
          var: y[0]['b1']['c2']
    
      - debug:
          var: y.0.b1.c2
    
    will lead to
    TASK [debug] ************************************************************************************
    ok: [localhost] => {
        "x['b1']['c2']": "aaa"
    }
    
    TASK [debug] ************************************************************************************
    ok: [localhost] => {
        "x.b1.c2": "aaa"
    }
    
    TASK [debug] ************************************************************************************
    ok: [localhost] => {
        "y[0]['b1']['c2']": "aaa"
    }
    
    TASK [debug] ************************************************************************************
    ok: [localhost] => {
        "y.0.b1.c2": "aaa"
    }
    

    Conclusion

    Filters like join, unique, setaddr, map etc. only make sense for the correct variable type. You always need to know what you are dealing with and thus you will be able to create working playbooks faster. It might also influence your design decision when you want to map data into a fitting yaml.

    Why did I write this article

    When I am writing Ansible playbooks they are often based on input yaml files (sometimes my own, sometimes from others) and also often these yaml files contain complex structures which need to be parsed and interpreted correctly.
    I am parsing complex structures by creating intermediate steps and creating new variables with set_fact which contain sub structures of the original one. A common mistake I make is that at certain points in my code I am not sure whether the variable in use is a list or a dictionary. Subsequently when I am using a method or filter this can lead to an error or - worse - to a valid but incorrect result (e.g. an "empty" variable) which will lead to further content errors downstream and the end result is puzzling.
    So I thought for my sake and the sake of the reader a little summary article would help, in particular since I find the Ansible documentation not always as helpful as it could be.
  • Tuesday, October 15, 2019

    Identifying and handling Java keystore store types in different Java versions

    Recently I encountered a different behaviour of Java keytool in newer versions of Java (I tested 10.0.2 and 11.0.4) compared to older versions (I tested 7.0_131 and 8.0_144) in regards to identifying store types.

    Generate keystore with various store types

    keytool is able to handle three different store types.
    Basically I am running these commands (regardless which Java version is in place). Store types are not case sensitive.
    keytool -genkey -alias foo -keystore a.keystore -storetype JKS
    keytool -genkey -alias foo -keystore b.keystore -storetype JCEKS
    keytool -genkey -alias foo -keystore c.keystore -storetype PKCS12
    

    In detail:
    I supply a password and simply hit Enter to all the questions being asked except the last one (answer y). I also don't provide a different key password.
    Note that the default store type has also changed between Java versions (JKS in Java 8, PKCS12 in Java 10) so running the above commands without -storetype .. will generate keystores of different type resp. to your Java version in use. It is best to always indicate a store type in order to avoid any disambiguity.

    keytool -genkey -alias foo -keystore a.keystore -storetype jks
    Enter keystore password:
    Re-enter new password:
    What is your first and last name?
    ...
    Is CN=Unknown, OU=Unknown, O=Unknown, L=Unknown, ST=Unknown, C=Unknown correct?
      [no]:  y
    
    Enter key password for 
            (RETURN if same as keystore password):


    Checking the keystore type via keytool -list

    Since keytool -list ... also indicates the store type (before listing the aliases) I am running
    keytool -list -keystore a.keystore
    keytool -list -keystore b.keystore
    keytool -list -keystore c.keystore
    

    Result for Java 7 and 8

    keytool -list -keystore a.keystore
    Enter keystore password:
    
    Keystore type: JKS
    Keystore provider: SUN
    
    Your keystore contains 1 entry
    
    foo, Oct 15, 2019, PrivateKeyEntry,
    Certificate fingerprint (SHA1): 69:B0:E2:F8:D4:C3:77:70:A2:20:AC:BE:51:B1:6A:FF:71:85:AF:4F
    
    keytool -list -keystore b.keystore
    keytool error: java.io.IOException: Invalid keystore format
    
    keytool -list -keystore c.keystore
    keytool error: java.io.IOException: Invalid keystore format


    i.e. keytool does not recognize the store type in Java 7 and 8
    If you want to see the list of aliases you need to know the store type in advance and indicate it on the command line.

    keytool -list -keystore b.keystore -storetype JCEKS
    Enter keystore password:
    
    Keystore type: JCEKS
    Keystore provider: SunJCE
    
    Your keystore contains 1 entry
    
    foo, Oct 15, 2019, PrivateKeyEntry,
    Certificate fingerprint (SHA1): 87:08:88:32:20:F2:61:11:C3:82:E0:DF:26:76:7B:8A:CD:2C:2C:B8
    
    keytool -list -keystore c.keystore -storetype PKCS12
    Enter keystore password:
    
    Keystore type: PKCS12
    Keystore provider: SunJSSE
    
    Your keystore contains 1 entry
    
    foo, Oct 15, 2019, PrivateKeyEntry,
    Certificate fingerprint (SHA1): E8:C4:B1:F2:E2:C9:7F:9F:D0:10:77:3D:F5:07:30:77:3C:E3:74:8D
    

    Result for Java 10 and 11

    The newer Java versions are able to list any store type.
    keytool -list -keystore a.keystore
    Enter keystore password:
    
    Keystore type: JKS
    Keystore provider: SUN
    
    Your keystore contains 1 entry
    
    foo, Oct 15, 2019, PrivateKeyEntry,
    Certificate fingerprint (SHA-256): 25:EB:EE:65:AC:AD:F5:44:58:90:82:E3:BE:9D:A2:AD:D0:EC:91:50:CB:72:75:C9:03:12:0F:58:4F:A5:FA:44
    
    Warning:
    The JKS keystore uses a proprietary format. It is recommended to migrate to PKCS12 which is an industry standard format using "keytool -importkeystore -srckeystore x.keystore -destkeystore x.keystore -deststoretype pkcs12".
    
    keytool -list -keystore b.keystore
    Enter keystore password:
    
    Keystore type: JCEKS
    Keystore provider: SunJCE
    
    Your keystore contains 1 entry
    
    foo, Oct 15, 2019, PrivateKeyEntry,
    Certificate fingerprint (SHA-256): B2:61:07:4D:D5:12:58:D7:F8:49:BB:1A:7E:69:FC:F2:C4:3E:3A:9B:F3:B0:E0:F0:F5:3E:9F:46:C4:8B:A7:86
    
    Warning:
    The JCEKS keystore uses a proprietary format. It is recommended to migrate to PKCS12 which is an industry standard format using "keytool -importkeystore -srckeystore y.keystore -destkeystore y.keystore -deststoretype pkcs12".
    
    keytool -list -keystore c.keystore
    Enter keystore password:
    Keystore type: PKCS12
    Keystore provider: SUN
    
    Your keystore contains 1 entry
    
    foo, Oct 15, 2019, PrivateKeyEntry,
    Certificate fingerprint (SHA-256): B4:E3:38:34:21:27:AC:0F:43:09:46:BC:FE:41:DF:1E:F5:5F:3A:75:75:52:D3:7C:42:A4:F7:57:B5:FC:34:9E
    

    Note that the fingerprints are different and the store types JKS and JCEKS generate a warning.
    The keystore provider for PKCS12 is SunJSSE in Java 7 and SUN in Java 10.


    On UNIX systems you can use the file command to get an indication of the resp. store type.
    file *.keystore
    
    a.keystore: Java KeyStore
    b.keystore: Java JCE KeyStore
    c.keystore: data
    
    i.e. the file "magic" can identify the old JKS and JCEKS keystores but the newest recommended PKCS12 is only shown as data.

    Thursday, September 19, 2019

    Assignment operator in python vs. copy

    Lately I stumbled across the following issue when assigning a variable to another (which was a list) and a change to the original reflected in the second.
    (This is in python 3.7. I am not using the python prompt >>> in the examples below.)

    x = ['a']
    y = x
    x.append('b')
    print(x)
       ['a', 'b']
    print(y)
       ['a', 'b']
    

    An example with int shows this

    x = 5
    y = x
    x = x + 7
    print(x)
      12
    print(y)
      5
    

    What might seem surprising at first glance totally makes sense:
    an assignment '=' is not a copy operation.

    The assignment

    x = something
    
    rather gives the name tag x to the object something.
    y = x
    
    gives the name tag y to the same object which is tagged x.
    There is no copy aka. creation of a new object happening here.

    The conclusion is:
    if the object tagged x is a changeable object any change will be seen in y too.
    So if the object is a list, tuple, set, dict etc. a change to the object (like the append operation) is both visible when either accessing x or y.

    If the object is an integer or a string then it cannot be changed. Operations like addition create a new object.
    x = x + 7 does not change the former object 5 but creates a new object 12.
    y is still pointing to the old object and thus shows the old value.

    If the intention of the original code was to create a copy of a list then a true copy operation should be used instead.

    y = x[:]
    

    Wednesday, March 6, 2019

    How to determine the number of elements of each directory in a directory tree

    Imagine that you have a directory tree with multiple sub directories and files and you want to determine the number of files and directories for each directory in this hierarchy i.e. not just direct elements but all elements of sub directories as well. Here I present a solution just using the UNIX tools find and awk.

    Creating an example directory tree

    With these commands I am creating a simple directory tree with some directories and files which I will use further on.
    mkdir -p somedir/d1/b somedir/d1/c somedir/d2 somedir/d3;    # Create some directories
    touch somedir/d1/b/file1 somedir/d3/file2;                   # Create some files
    ln -s somedir/d3/file2 somedir/d3/z;                             # Create symbolic links
    (cd somedir; ln -s d1 d4_link ;)
    
    find somedir
    somedir
    somedir/d1
    somedir/d1/b
    somedir/d1/b/file1
    somedir/d1/c
    somedir/d2
    somedir/d3
    somedir/d3/file2
    somedir/d3/z
    somedir/d4_link
    
    I want some code to show me that somedir contains 9 elements and somedir/d1 contains 3 elements aso.

    List the complete directory tree with types of files

    On Linux systems with GNU find (unfortunately this does not work on my Mac) one can easily retrieve a list of elements and their file types with the printf formatting options. My example contains six directories (including the topmost somedir), two files and two symbolic links (one to a file and one to a directory).
    find somedir -printf '%y %p\n'
    
    d somedir
    d somedir/d1
    d somedir/d1/b
    f somedir/d1/b/file1
    d somedir/d1/c
    d somedir/d2
    d somedir/d3
    f somedir/d3/file2
    l somedir/d3/z
    l somedir/d4_link
    

    Calculating the number of entries per directory

    First of all the awk command consumes a slightly modified output of the find from above:
    I am adding a slash so that I can use the slash as an awk field delimiter.
    find somedir -printf '%y/%p\n'
    
    ...
    d/somedir/d1/b
    ...
    
    The awk command:
    awk -F/ '
    { 
      x = $2; 
      count[x]++; 
      for(i=3;i<=NF;i++) { x = x FS $i; count[x]++ } 
      type[x] = $1;
    } 
    END {
      for(i in count)  printf "%s %2d %s\n", type[i],count[i]-1,i
    }'
    
    What happens in each step: the first field is the type of the element ( d for directory, f for field etc.), the count array is increased for each occurance of a path.
    d/somedir
    
      x = "somedir"
      count["somedir"] = 1
      # the for loop is not executed for "d/somedir" since NF=2
      type["somedir"} = "d"
    
    d/somedir/d1
      x = "somedir"
      count["somedir"] = 2      # increase count by 1
     
      # NF = 3. The for loop is executed once.
      x = x FS "a" = "somedir/d1"
      count["somedir/d1"] = 1    # first time: 1
    
      type["somedir/d1"] = "d"
    
    d/somedir/d1/b
      x = "somedir"
      count["somedir"] = 3      # increase count by 1
     
      # NF = 4. The for loop is executed twice.
      x = x FS "a" = "somedir/d1"
      count["somedir/d1"] = 2    # increase count by 1
    
      x = x FS "b" = "somedir/d1/b"
      count["somedir/d1/b"] = 1  # first time: 1
    
      type["somedir/d1/b"] = "d"
    

    Here is the combined command sequence also appended by a sort statement for better readability

    find somedir -printf '%y/%p\n'  | 
    awk -F/ '{ x=$2; count[x]++; for(i=3;i<=NF;i++) { x=x FS $i; count[x]++ } type[x]=$1;} 
    END {for(i in count)  printf "%s %2d %s\n", type[i],count[i]-1,i } '|
    sort  -k3,3
    
    d  9 somedir
    d  3 somedir/d1
    d  1 somedir/d1/b
    f  0 somedir/d1/b/file1
    d  0 somedir/d1/c
    d  0 somedir/d2
    d  2 somedir/d3
    f  0 somedir/d3/file2
    l  0 somedir/d3/z
    l  0 somedir/d4_link
    
    So somedir contains 9 elements altogether: 4 direct elements d1, d2, d3 and d4_link and also elements of elements.
    Note that the END statement prints the count minus one since the count was set to one when the directory appeared originally but we want to show only the number of elements i.e. I need to exclude the directory itself.
    Note also that somedir/d4_link (the symbolic link to directory somedir/d1) is not followed and listed as having zero elements. If you want to follow symbolic links to directories with find somedir -follow the calculations will be misleading since - in this example - elements of d1 and d4_link would be calculated twice.

    The counts for non-directory file types should always be zero, they could probably be excluded completely from the output.

    find somedir -printf '%y/%p\n'  | 
    awk -F/ '{ x=$2; count[x]++; for(i=3;i<=NF;i++) { x=x FS $i; count[x]++ } type[x]=$1;} 
    END {for(i in count) if( type[i]=="d") printf "%2d %s\n", count[i]-1,i } '| sort  -k2,2
    
     9 somedir
     3 somedir/d1
     1 somedir/d1/b
     0 somedir/d1/c
     0 somedir/d2
     2 somedir/d3
    

    Usages

    Empty directories

    Add a grep '^d 0' (or adjust the awk code with if clause count[i]==1 etc.)
    find somedir -printf '%y/%p\n'  | 
    awk -F/ '{ x=$2; count[x]++; for(i=3;i<=NF;i++) { x=x FS $i; count[x]++ } type[x]=$1;} 
    END {for(i in count)  printf "%s %2d %s\n", type[i],count[i]-1,i } '|
    grep '^d  0'
    
    d  0 somedir/d1/c
    d  0 somedir/d2
    

    Non-empty directories

    find somedir -printf '%y/%p\n'  | 
    awk -F/ '{ x=$2; count[x]++; for(i=3;i<=NF;i++) { x=x FS $i; count[x]++ } type[x]=$1;} 
    END {for(i in count)  printf "%s %2d %s\n", type[i],count[i]-1,i } '|
    grep '^d .[^0]' | sort -k 3,3
    
    d  9 somedir
    d  3 somedir/d1
    d  1 somedir/d1/b
    d  2 somedir/d3
    

    Wednesday, February 20, 2019

    Using the 'timeout' command

    In Linux there is timeout command (usually in /usr/bin/timeout) which is very handy when you really want to restrict possibly long running commands. Here I want to show a couple of invocations to explain its usage.

    First of all: timeout exits with error code 124 if the timeout has been reached.
    Of particular interest is the handling of exit codes if commands are failing.

    I am playing with various invocations of a timeout setting of 3 seconds and a sleep command of 5 seconds and vice versa.

    Output Exit code
    The timeout threshold is reached.
    timeout 3 sleep 5
    124
    timeout 3 sh -c "sleep 5; exit 1"
    124
    timeout 3 sh -c "echo something; sleep 5; exit 1"
    something124Failure
    but part of the commands ran successfully creating output.
    timeout 3 sh -c " sleep 5; echo something; exit 1"
    124
    The timeout threshold is not reached.
    timeout 5 sleep 3
    0Success.
    The command finished before the timeout threshold.
    timeout 3 sh -c "exit 1"
    1Failure.
    The command finished before the timeout threshold but with an error.
    timeout 3 sh -c "echo something; exit 1"
    something1Failure.
    The commands ran and finished before the timeout threshold but with an error.

    Here is an example that shows how a loop gets executed partially.

    timeout 3 sh -c "for i in 1 2 3; do sleep 1; echo i=\$i;  done"
    
    i=1
    i=2
    
    and exit code 124
    
    In this case one needs to carefully continue and understand possible consequences of a partially executed command chain and how to recover from timeout errors.

    Error handling could be done this way:

    case $? in
    0)
      # all ok
      ;;
    124)
      # this was a timeout
      ;;
    *)
      # some other error induced by the executed command(s)
      ;;
    esac
    

    Maybe this usage is also helpful sometimes: capture only the timeout exit code.

    timeout 3 sh -c "echo something; sleep 5" || { [ $? -eq 124 ] && echo TIMEOUT; }
    echo $?
    
    will show output of the executed command, the timeout exit code check and an exit code 0
    
    something
    TIMEOUT
    0
    
    Interesting to see what happens when the executed command fails. The exit code of the failed command is still available to subsequent checks.
    timeout 3 sh -c "echo something; exit 1" || { [ $? -eq 124 ] && echo TIMEOUT; }
    echo $?
    
    will show output of the executed command(s) and the exit code of the command chain
    
    something
    1
    

    Thursday, February 14, 2019

    Ansible tags with 'include'

    When using the include directive things do not quite work as I would expect when I also add a tag to the include section.

    Note: this was tested with Ansible 2.5.2 and python 2.7.15

    Scenario

    I split the playbook of the previous example into two:
    The tasks (tagged in the same fashion as before) have been moved to a new file include_this.yml:
    ---
    
    - name: Debug No Tag
      debug:
        msg: "No tag"
    
    - name: Debug Tag A
      debug:
        msg: "Tag A"
      tags:
        - tagA
    
    - name: Debug Tag B
      debug:
        msg: "Tag B"
      tags:
        - tagB
    
    - name: Debug Tag A and B
      debug:
        msg: "Tag A and B"
      tags:
        - tagA
        - tagB
    
    The playbook playbook.yml has been reduced to two tasks:
    • one debug task
    • one include task
    I am testing two versions: the second one has an additional tag for the include directive.

    Version 1Version 2
    - name: Debug Playbook
      hosts: localhost
      tasks:
        - name: Debug No Tag in Playbook
          debug:
            msg: "No tag in playbook"
        - name: Include
          include: include_this.yml
    
    - name: Debug Playbook
      hosts: localhost
      tasks:
        - name: Debug No Tag in Playbook
          debug:
            msg: "No tag in playbook"
        - name: Include
          include: include_this.yml
          tags:
            - tagA
    

    The playbook is run as

    ansible-playbook [--tags tagA] [--skip-tags tagB] playbook.yml

    Results for version 1

    If called with --tags or --skip-tags version 1 delivers the same results as described in my previous post when the include file was part of the playbook.
    The additional 5th task in playbook.yml is executed in case of --skip-tags tagB or when no arguments are supplied.
    no args
    TASK [Debug No Tag in Playbook] 
    TASK [Debug No Tag] 
    TASK [Debug Tag A] 
    TASK [Debug Tag B]
    TASK [Debug Tag A and B]
    
    --tags tagA
    TASK [Debug Tag A] 
    TASK [Debug Tag A and B]
    
    --tags tagA --skip-tags tagB
    TASK [Debug Tag A] 
    
    --skip-tags tagB
    TASK [Debug No Tag in Playbook]
    TASK [Debug No Tag] 
    TASK [Debug Tag A] 
    
    Now I am reversing tagA and tagB in the call which leads to the expected results.
    --tags tagB
    TASK [Debug Tag B] 
    TASK [Debug Tag A and B]
    
    --tags tagB --skip-tags tagA
    TASK [Debug Tag B] 
    

    Results for version 2

    no args
    TASK [Debug No Tag in Playbook] 
    TASK [Debug No Tag] 
    TASK [Debug Tag A] 
    TASK [Debug Tag B]
    TASK [Debug Tag A and B]
    
    Same as version 1.
    All five tasks are being executed for both version of the playbook. This works as expected. No restrictions of any sort apply.
    --tags tagA
    TASK [Debug No Tag] 
    TASK [Debug Tag A] 
    TASK [Debug Tag B]
    TASK [Debug Tag A and B]
    
    All four task of the included files are being executed. No filtering by tagA for the included file takes place. This was a complete suprise to me. It seems that the tagging of the include step supersedes somehow the tags of the included file.
    --tags tagA --skip-tags tagB
    TASK [Debug No Tag]
    TASK [Debug Tag A] 
    
    The negative filter is applied to the result before and leaves two tasks for execution.
    --skip-tags tagB
    TASK [Debug No Tag in Playbook]
    TASK [Debug No Tag] 
    TASK [Debug Tag A] 
    
    Same as version 1.
    The two tasks with tagB are skipped and the other three are executed.
    --tags tagB
    TASK [Debug Tag B]
    TASK [Debug Tag A and B]
    
    Same as version 1.
    The two tasks with tagB are executed and the tag setting in the include directive is not taken into account.
    --tags tagB --skip-tags tagA
    ... nothing ...
    Now here is a surprise. The --skip-tags tagA has skipped the whole include file and no task is being executed at all.

    An explanation using sets

    Let's look at it from a set perspective.
    --tags tagA--skip-tags tagA
    These two results are complementary and - if joined - build the complete set.
    TASK [Debug No Tag] 
    TASK [Debug Tag A] 
    TASK [Debug Tag B]
    TASK [Debug Tag A and B]
    
    TASK [Debug No Tag in Playbook] 
    Here the same complimentary sets for tagB.
    --tags tagB--skip-tags tagB
    TASK [Debug Tag B]
    TASK [Debug Tag A and B]
    
    TASK [Debug No Tag in Playbook]
    TASK [Debug No Tag] 
    TASK [Debug Tag A]  
    Now any invocation of --skip-tags leads to an intersection with the respective sets.
    Example: --tags tagB --skip-tags tagA: the sets have no task in common and thus nothing will be executed.

    Conclusion

    My idea was that a tag for the include directive would determine whether the include happens or not. Obviously wrong. It seems that it only determines which other tasks in the playbook.yml are executed i.e. it prohibits the untagged task from being run. The include takes place in any case (see the examples when using tagB either in --tags or --skip-tags) but in a strange way since only other tags than the supplied one are applied. I find this hard to remember or explain so my personal rule of mutual tag exclusion will be:
    • tagged include section => no tags in the included file
    • tags in the included file => no tag for the include section

    Ansible tags

    Lately I got a little confused about properly using Ansible tags so I thought I spend a couple of minutes to create a simple example to show how to use them and also explain the pitfalls (at least how I see them).

    Note: this was tested with Ansible 2.5.2 and python 2.7.15

    Scenario

    My example scenario is simple:
    • I have a small playbook with 4 tasks: one task without tag, two tasks with a different tag each and the 4th task with both tags
      - name: Debug Playbook
        hosts: localhost
        tasks:
          - name: Debug No Tag
            debug:
              msg: "No tag"
      
          - name: Debug Tag A
            debug:
              msg: "Tag A"
            tags:
              - tagA
      
          - name: Debug Tag B
            debug:
              msg: "Tag B"
            tags:
              - tagB
      
          - name: Debug Tag A and B
            debug:
              msg: "Tag A and B"
            tags:
              - tagA
              - tagB
      
    • I am running 4 invocations of the playbook with a mix of --tags and --skip-tags to show the effects on the possible outcomes

    Results

    • No tag arguments:
      ansible-playbook playbook.yml
      All tasks are executed.
      TASK [Debug No Tag] *****************************
      ok: [localhost] => {
          "msg": "No tag"
      }
      
      TASK [Debug Tag A] ******************************
      ok: [localhost] => {
          "msg": "Tag A"
      }
      
      TASK [Debug Tag B] ******************************
      ok: [localhost] => {
          "msg": "Tag B"
      }
      
      TASK [Debug Tag A and B] ************************
      ok: [localhost] => {
          "msg": "Tag A and B"
      }
      
    • Supply --tags tagA:
      ansible-playbook --tags tagA playbook.yml
      All tasks are executed where tagA is listed. This works as expected: --tags acts as a filter.
      TASK [Debug Tag A] ******************************
      ok: [localhost] => {
          "msg": "Tag A"
      }
      
      TASK [Debug Tag A and B] ************************
      ok: [localhost] => {
          "msg": "Tag A and B"
      }
      
    • Use both --tags and --skip-tags:
      ansible-playbook --tags tagA --skip-tags tagB playbook.yml
      Only the task tagged tagA is executed. The task with both tags is skipped.
      This actually got me confused. Now when writing this blog it seems obvious: --skip-tags acts as a negative filter i.e. it will skip all tasks where tagB is mentioned.
      TASK [Debug Tag A] ******************************
      ok: [localhost] => {
          "msg": "Tag A"
      }
      
    • Supply --skip-tags tagB:
      ansible-playbook --skip-tags tagB playbook.yml
      All tasks are skipped where tagB is listed, in particular the task without tags is also executed.
      TASK [Debug No Tag] *****************************
      ok: [localhost] => {
          "msg": "No tag"
      }
      
      TASK [Debug Tag A] ******************************
      ok: [localhost] => {
          "msg": "Tag A"
      }
      

    To remember

    • As soon as you switch to using tags via --tags none of the untagged tasks will be executed any longer. If you want the untagged task to be executed in any case you need to supply all possible tags of your playbooks.
    • When mixing --tags and --skip-tags in one call both filters work in conjunction: --tags selects all tasks with the given tags(s), --skip-tags reduces this set by all tasks with the given skip tags.

    The scenario can get a bit trickier when invoking include sections. I will explain this in another blog.

    A list of Google fonts

    Here is a list of Google fonts. It is constructed with Javascript and CSS and dynamically embedded into this blog.

    Some fonts can be made more effective in bigger sizes or by applying font effects but that would be too much for this overview.
    Enjoy and find your font.

    Monday, February 11, 2019

    How to use Google fonts (even in this blog)

    Google provides a huge list of fonts and it describes how to use them in detail, in particular applying font effects and more.

    I thought it worthwhile to capture the essence of using fonts and also I wanted to see if I could use Google fonts in this blog.

    Using Google fonts boils down to three things actually:

    • load the font from Google by supplying a link in the <head> section of your HTML document
      <link href="https://fonts.googleapis.com/css?family=Amarante" rel="stylesheet">
      
    • defining a corresponding style e.g. a class style with a name
      <style>
        .coolFont { font-family: Amarante }
      </style>
      
    • applying this font to any element with
      < ... class="coolFont" ... >
      

    Here is a Javascript code snippet (which I actually included in the HTML text) which dynamically loads three fonts and defines three correponding styles. It applies each of the styles to an h1 element.

    <script>
    var fonts = [ 'Acme', 'Amarante', 'Audiowide' ]
    
    for( i=0; i<fonts.length; i++ ) {
      var style = document.createElement( 'STYLE' );
      // Define class style '.font0', '.font1' etc.
      style.innerHTML = ".font" + i + "{ font-family: " + fonts[i] + ";}"
      document.getElementsByTagName('head')[0].appendChild( style );
    
      var  link = document.createElement( 'LINK' );
      link.setAttribute( 'href', 'https://fonts.googleapis.com/css?family=' + encodeURI( fonts[i] ) );
      link.setAttribute( 'rel', "stylesheet" ) ;
      document.getElementsByTagName('head')[0].appendChild( link );
    }
    </script>
    
    <h1 class="font0">Cool font, dude! </h1>
    <h1 class="font1">Cool font, dude! </h1>
    <h1 class="font2">Cool font, dude! </h1>
    
    This will create a links like this
    <link href="https://fonts.googleapis.com/css?family=Amarante" rel="stylesheet">
    
    and styles
    .font1 {
      font-family: Amarante;
    }
    

    and here is the result

    Cool font, dude!

    Cool font, dude!

    Cool font, dude!

    Thursday, January 24, 2019

    How to get coloured output from 'find'

    When I need to get coloured output from shell scripts (e.g. in error messages) I am using the oldstyle escape sequences.

    Example:

    printf "\e[31mERROR - some error description\e[0m\n"
    
    which will result in
    ERROR - some error description
    
    \e[31m is basically ESCAPE and a colour code (31 for red, see ANSI escape codes) for colour terminals. \e[0m ends the colouring.

    I wanted to use the colour escape sequences in the printf of find.

    This does not work when using \e and an error is thrown:

    find . -printf "\e[31mSome Output\n" -quit
    find: warning: unrecognized escape `\e'
    \e[31mSome Output
    
    The solution is to replace \e by its octal representation \033 (see e.g. ASCII table).
    find . -printf "\033[31mSome Output\n" -quit
    Some Output
    

    Of course the find command in the example is not really useful (it quits right away) and it is only used to showcase the issue. Here is a more useful invocation:

    find empty and non-empty sub directories whereas non-empty should be coloured.

    # Create example directories
    mkdir -p tmp/a tmp/b tmp/c; touch tmp/b/foo
    
    # Find
    find tmp -type d \( -empty -printf "%-10p empty\n" \) -o \
    \( ! -empty -printf "\033[31m%-10p not empty\033[0m\n" \)
    tmp        not empty
    tmp/a      empty
    tmp/b      not empty
    tmp/c      empty
    
    i.e. I can distuingish in find between different cases and apply different colours according to my needs.

    Monday, December 10, 2018

    How to write better/safer functions for UNIX commands through the example of 'mkdir'

    UNIX shell scripts contain loads of UNIX commands. Very often these commands are invoked in a simple manner which do not quite meet the standards of being production worthy.
    I don't want to discuss here what standards of production worthiness are but I want to show a few steps to improve your scripts from using a very simple command invocation to a more refined usage of the command.
    My main consideration is this:
    • easiness of trouble shooting: scripts will fail. The script should behave in a way to make it easy for a troubleshooter to identify the root cause of the failure.

    This implies: errors should be handled properly i.e. they should be
    • caught,
    • documented e.g. in log files and
    • finished. Finishing means e.g. revoking certain actions being done beforehand, cleaning up temporary stuff, continuing with other actions or exiting the script (if appropriate).
    Before I start with my example I'd like to highlight an important thing which is also a main driver for this tutorial: many UNIX commands fail in a very simple manner. There can be a number of reasons for failure but the command always exits with exit code 1 and writes a more or less descriptive error message (to stderr). Not all of the failure reasons might lead to the same behaviour, reason A might be grave and imply exiting the script, reason B might be skipped.

    I'll explain this through the example of mkdir. As a teaser here is a common scenario:
    scripts often create temporary directories at the start. If the temporary directory already exists you probably don't care and despite of a mkdir failure would like to continue. If mkdir fails because the script is executed in a wrong directory where you don't have write permissions you probably don't want to continue and rather exit. This should be handled in your code.

    Here is the starting point: a simple invocation of mkdir.
    mkdir tmpdir
    If this command fails the script will show an error message and probably exit e.g. if set -e is set in bash.
    If you want to catch the error and decide what to do there are some options. You could use the shell binary operators AND (&&) or OR (||).

    • you definitely want to exit: mkdir tmpdir || exit 1
    • you do not want to exit the script but write a specific message:
      mkdir tmpdir || echo "WARNING - mkdir of tmpdir failed"
    • you want to define some actions (which might include an exit):
      mkdir tmpdir
      if [ $? -ne 0 ] ; then
        # Do something here e.g.
        echo "ERROR - mkdir of tmpdir failed. Exiting." >&2
        exit 1
      fi
      
    Now assume that sometimes you want to exit if mkdir fails and sometimes not. An idea is to write a wrapper function which contains all the logic.
    # Function 'mkDir'
    # $1: Y/N flag to exit (Y) or not (N) in case of failure
    # $2: the directory to be created
    function mkDir() {
      mkdir "$2"     # execute mkdir command
      rc=$?          # capture return code
      # If successful return immediately
      [ $rc -eq 0 ] && return 0
      # Check if exit is required
      if [ "$1" = "Y" -o "$1" = "y" ] ; then
        echo "ERROR - mkdir failed for $2" >&2
        exit 1
      fi
      echo "WARNING - mkdir failed for $2" >&2
      return $rc
    }
    
    # invocation
    
    mkDir Y tmpdir
    
    # A loop to create a number of directories.
    # We want to loop through all directories 
    # regardless if a mkdir fails or not and 
    # create a tmpfile in each of them.
    for tmpdir in a b c ; do
      mkDir n $tmpdir || continue
      touch $tmpdir/tmpfile
    done
    
    A trickier handling would be to distinguish different errors. Two main reasons for a mkdir failure are
    • the directory already exists
    • the directory cannot be created because of issues with parent directory of the new directory (which could be . or an absolute path) like missing write permissions (w missing for owner, group or other, depending on who runs the script where)

    So here is an extended version of our wrapper function, also adding different return codes for various findings.
    # Function 'mkDir'
    # $1: Y/N flag to exit (Y) or not (N) in case of failure
    # $2: the directory to be created
    # Return codes:
    #   0: all ok, directory could be created
    #   1: mkdir failed (for a different reason than the assertions)
    #   2: directory already exists
    function mkDir() {
      DIR="$2"
    
      # Before executing mkdir we run a couple of assertions.
    
      # Check if directory already exists
      [ -d "$DIR" ] && echo "WARNING - directory $DIR already exists" && return 2
    
      # Check if parent directory exists and is writable
      # If not: we exit here 
      PARENTDIR=`dirname $DIR`
      [ ! -d "$PARENTDIR" ] && echo "ERROR - parent directory $PARENTDIR does not exist" && exit 1
      [ ! -w "$PARENTDIR" ] && echo "ERROR - parent directory $PARENTDIR is not writable" && exit 1
    
      # Now we try to run the mkdir command
      mkdir "$DIR"   
      rc=$?          # capture return code
      # If successful return immediately
      [ $rc -eq 0 ] && return 0
    
      # Here we know: mkdir failed but not for the two reasons we checked earlier
      # Check if exit is required
      if [ "$1" = "Y" -o "$1" = "y" ] ; then
        echo "ERROR - mkdir of $DIR failed" >&2
        exit 1
      fi
      echo "WARNING - mkdir of $DIR failed" >&2
      return $rc
    }
    
    
    # Invocations
    
    mkDir n tmpdir
    mkDir n tmpdir      # this one fails because tmpdir already exists
    
    mkDir n abc/tmpdir  # this one fails if abc does not exist
    
    mkDir n /tmpdir     # this one fails because we cannot write to a root owned directory
    

    The examples above were mainly showing how to capture and finish failures. I probably will write about documenting errors in a separate blog which will cover separation or unification of stderr and stdout, redirecting messages to a proper log file and if needed show messages in parallel on the terminal.

    Conclusion

    In order to make life easier when trouble shooting script failures it it advisable to wrap UNIX commands into functions and create some error handling logic for known and common error causes. In the long run and in particular if used by a number of different persons you will save time since the script will throw out a specific defined error message. The various error causes of a command can drive different behaviour in the script which does help write better logic flows.

    Note 1

    Using other programming languages does not necessarily help. The Java java.io or java.nio packages would throw a Java IOException, again not very distinguishable and too simple.

    Note 2

    I wonder why there is no shell library around to cover this topic, basically a shell library of UNIX command wrapper functions. Maybe I have not searched enough.

    Thursday, December 6, 2018

    Thoughts about error messages and troubleshooting

    In this article I will discuss a couple of thoughts about error messages and their helpfulness to troubleshoot the real issue or - as it turns out - often inadequacy in quickly troubleshooting errors and I also give an example at the very end how to do better.

    My example is: remove a directory (in UNIX)
    The usual command is something like
    rm -r somedir
    Things can go wrong and you will end up with a
    rm: somedir: Permission denied

    I bet many of the readers will have encountered this in their UNIX lives (sysadmin or not).
    The unfortunate thing for troubleshooting this error is that there can be multiple causes for it. Depending on your experience you can more or less quickly spot the root cause in your real world scenario. The not so obvious fact - at least to the unexperienced user - is that in order to remove a directory you need sufficient permissions for the directory and also sufficent permissions for its parent directory.
    In more abstract terms going beyond directory removal: any action failing with permission denied probably requires permissions (1) for the object to be handled but (2) also for one or more contextual objects.
    Going back to the directory removal here are number of permission issues which are all negatives of the necessary rule: the user executing the rm needs to have read and write permissions on the directory and its parent directory (which requires execute permission too). This can be achieved via user, group or other permission and ownership settings.
    (Note: I am not discussing even more refined settings via ACLs which is adding to complexity).
    Even if both directory and parent directory are owned by the executing user there are number of error causes.

    • directory does not have write permissions
    • directory has write permissions but no read permission
    • parent directory does not have write or execute permissions
    Now after this long explanation I am coming to my actual message: Error messages are often not precise enough to help in quick trouble shooting. You need some meta knowledge and experience to identify the root cause which will allow you to resolve the issue.
    In the example above the standard UNIX rm is mapping a list of different root causes into a single permission denied error message leaving it to the user to know and investigate the various causes.
    I tried a different approach using Java and the Java java.io.File and java.nio.file.Files packages to delete a directory but their exceptions (IOExcepction) are equally simplistic and do not help to identify the root cause quickly.

    I am wondering why this is the case, in general, not just reduced to this example.
    My experience in Application Support is that it is most important to quickly identify root causes. Why should a user be left with poking around rather than giving him/her the actual root cause right away?
    If the rm command knows that the write permission for the directory is missing why doesn't it tell us right away?
    I am seeing this way of thinking at all kinds of levels in Software development. Rather than giving all the information about an error scenario the user is stuck with some general blurb and needs to spend time. My example is from a rather low level and things get more frustrating the further one moves up the software ladder. Complex GUI based applications are even more frustrating to troubleshoot.


    Here is a script to generate some directories with wrong permissions and test rm. I am creating 3 directories with different permissions. Two removals will fail
    mkdir -m 000 somedir1
    mkdir -m 200 somedir2
    mkdir -m 600 somedir3
    ls -la
    rm -r somedir1 somedir2 somedir3
    ls -la
    

    Here is the output:
    total 0
    drwxr-x---   5 ahaupt  2006807681  170 Dec  6 16:51 .
    drwxr-xr-x  10 ahaupt  2006807681  340 Dec  6 13:46 ..
    d---------   2 ahaupt  2006807681   68 Dec  6 16:51 somedir1
    d-w-------   2 ahaupt  2006807681   68 Dec  6 16:51 somedir2
    drw-------   2 ahaupt  2006807681   68 Dec  6 16:51 somedir3
    
    rm: somedir1: Permission denied
    rm: somedir2: Permission denied
    
    drwxr-x---   4 ahaupt  2006807681  136 Dec  6 16:51 .
    drwxr-xr-x  10 ahaupt  2006807681  340 Dec  6 13:46 ..
    d---------   2 ahaupt  2006807681   68 Dec  6 16:51 somedir1
    d-w-------   2 ahaupt  2006807681   68 Dec  6 16:51 somedir2
    
    Now let's re-create somedir3 again but remove the write permission for the current directory. All 3 removals will fail.
    mkdir -m 600 somedir3
    chmod u-w .
    ls -la
    rm -r somedir1 somedir2 somedir3
    ls -la
    

    dr-xr-x---   5 ahaupt  2006807681  170 Dec  6 16:55 .
    drwxr-xr-x  10 ahaupt  2006807681  340 Dec  6 13:46 ..
    d---------   2 ahaupt  2006807681   68 Dec  6 16:51 somedir1
    d-w-------   2 ahaupt  2006807681   68 Dec  6 16:51 somedir2
    drw-------   2 ahaupt  2006807681   68 Dec  6 16:55 somedir3
    
    rm: somedir1: Permission denied
    rm: somedir2: Permission denied
    rm: somedir3: Permission denied
    
    total 0
    dr-xr-x---   5 ahaupt  2006807681  170 Dec  6 16:55 .
    drwxr-xr-x  10 ahaupt  2006807681  340 Dec  6 13:46 ..
    d---------   2 ahaupt  2006807681   68 Dec  6 16:51 somedir1
    d-w-------   2 ahaupt  2006807681   68 Dec  6 16:51 somedir2
    drw-------   2 ahaupt  2006807681   68 Dec  6 16:55 somedir3


    Finally here is a *shell snippet* which gives proper information by catching some of the root causes of a failing rm. This is not exhaustive but should give you an idea what could be done to improve the error handling and make it more user friendly.
    function rmDir {
      DIR="$1"
      PARENTDIR=`dirname $1`
      MSG=""
      # Check write permission of dir
      [ ! -w "$DIR" ] && MSG="$MSG
    ERROR - not writable $DIR"
      # Check read permission of dir
      [ ! -r "$DIR" ] && MSG="$MSG
    ERROR - not readable $DIR"
      # Check write permission of parent dir
      [ ! -w "$PARENTDIR" ] && MSG="$MSG
    ERROR - not writable $PARENTDIR"
      # Check execute permission of parent dir
      [ ! -x "$PARENTDIR" ] && MSG="$MSG
    ERROR - not executable $PARENTDIR"
      [ ! -z "$MSG" ] && echo "$MSG" && exit 1
      rm -r $DIR
    }
    
    In a scenario like below you will get adequate error messages and there is not even a try to invoke the real rm.
    dr-xr-x---   4 ahaupt  2006807681  136 Dec  6 22:52 .
    drwxr-xr-x  11 ahaupt  2006807681  374 Dec  6 22:57 ..
    d-w-------   2 ahaupt  2006807681   68 Dec  6 16:51 somedir2
    
    rmDir somedir2
    
    ERROR - not readable somedir2
    ERROR - not writable .
    

    Of course it is difficult to think about all possible error cases in advance but I claim that there are many cases where it would be possible to enhance the code and show more detailed and more precise messages than a simple mapping of many kinds of errors into a vague error statement.

    Tuesday, April 18, 2017

    Create bootable USB stick with Linux for old Macbook with MacOS 10.5.8

    Since my old MacBook with MacOS 10.5.8 is only running with outdated browser versions I am having more and more troubles looking at modern websites which are using fancy features (LinkedIn, Ryanair, ...). Since I cannot upgrade the machine I needed a workaround to access up-to-date browsers. An idea was to create a bootable USB stick with Linux.
    You basically need to
  • download a Linux image iso file
  • prepare the USB stick so that it can receive the iso file
  • copy the iso file onto the stick
  • There are GUI tools out there which can achieve this but I prefer the simple command line set of instructions which I could not find for MacBooks. I did find instructions for creating a USB stick on a Linux or Windows box though which I combined with instructions for the particular device handling on MacBooks.
    Main resources:

  • http://askubuntu.com/questions/372607/how-to-create-a-bootable-ubuntu-usb-flash-drive-from-terminal
  • Download Linux image

    Download your favourite Linux image which you want to put onto the USB stick. I opted for Lubuntu from https://help.ubuntu.com/community/Lubuntu/GetLubuntu
    where I chose the PC 64bit Standard image disc.

    Attach the USB stick

    Attach the USB stick to a USB port. It will be shown in Finder. Check on the system:
    mount points: my USB stick is mounted under disk2, to be precise: the file system in partition s1 is mounted.

    ls of disk devices: disk2 is the whole device, disk2s1 is the partition with the file system

    Unmount the partition

    What we want is: keep the USB stick attached and in the list of devices but unmount all partitions. Eject in Finder is no option since it will completely remove the device. We only want to unmount the USB stick.Overall this was the trickiest part since the normal UNIX umount did not work as expected. The usual umount does not work on MacOS since there are applications (spotlight, etc.) constantly accessing the file system so an error is thrown (of course this command and all the following need to be done as root therefore I am using sudo):


    One could try to kill all these processes (after first identifying them) but the real trick is to use the Mac specific diskutil command:


    Write Linux image to USB stick

    The good old dd is all you need. Input file if is the Linux iso file, output file of is the USB device (note the full device /dev/disk2, not a particular partition), and block size 4MB (could be anything which you think feasible on your machine).

    Note: this takes some time, 22 minutes in my case.

    Reboot and choose USB stick

    Now when rebooting the machine and pressing the Option button after the sound there is screen showing the old Mac harddisk and an EFI as boot options.

    Thursday, April 23, 2015

    A hack to continue with Skype 6.3 on MacOS 10.5.8

    Today Skype users on MacOS 10.5.8 were surprised again that Skype rejected the login and requested to upgrade to a new version. Navigating to the new version download announced once again:

    This had happened in the past and the solutions then ranged from installing every old versions of Skype (2.8) to tampering with certain system settings, last year Skype released an officially supported version 6.3 for MacOS 10.5.8 but this only lasted until today.

    So I tried various things and a variation of earlier solutions did it for me which I would like to share with the community. In summary: trick Skype into thinking that you are running a higher version than 6.3.

    Change 3 settings in the info.plist file

  • First of all quit Skype so that no Skype process is running anymore
  • Open info.plist with the property editor (in Finder -> Applications choose Skype, right-mouse click and choose Show Package Contents, in the new window double-click on Contents and double-click on info.plist )
  • Change
    BuildMachineOSBuild 12F45
    Bundle versions string, short 6.15
    Bundle version 6.15.0.330
    The previous settings were for me 6.3.0.604 and 12C3103.
  • Close the property editor and Save the file

    Change the /etc/hosts file

    This prevents that your network contacts the Skype download server.

  • Edit the /etc/hosts file (with your editor of choice)
  • Enter this line
    127.0.0.1       ui.skype.com
  • Start Skype and login again

    There you go.
    Let's wait and see until this solution becomes obsolete.

  • Wednesday, August 7, 2013

    Creating a MySQL db on Ubuntu as a normal user

    Lately I tried to create a MySQL db on Ubuntu (version 11 which has MySQL 5.1 preinstalled). I was logged in under my normal username but I got a surprise when running the mysql_install_db command.
    $ /usr/bin/mysql_install_db --datadir=./mysql/data
    Installing MySQL system tables...
    
    130806 22:17:21 [Warning] Can't create test file /home/andreash/mysql/data/andreas-Ub-2.lower-test
    130806 22:17:21 [Warning] Can't create test file /home/andreash/mysql/data/andreas-Ub-2.lower-test
    
    Installation of system tables failed!  Examine the logs in
    ./mysql/data for more information.
    ...
    

    There were not log files though and checking directories and permissions didn't reveal any problems.
    So I started to search and found that Ubuntu uses a security mechanism called apparmor which can be used to control certain aspects of an application.
    In regards to MySQL that means that there exists a MySQL profile which defines which directories can be accessed (and how) by the MySQL programs. The profile for the daemon mysqld is defined in /etc/apparmor.d/usr.sbin.mysqld and looks like this:

    # Last Modified: Tue Jun 19 17:37:30 2007
    #include <tunables/global>
    
    /usr/sbin/mysqld {
      #include <abstractions/base>
      #include <abstractions/nameservice>
      #include <abstractions/user-tmp>
      #include <abstractions/mysql>
      #include <abstractions/winbind>
    
      capability dac_override,
      capability sys_resource,
      capability setgid,
      capability setuid,
    
      network tcp,
    
      /etc/hosts.allow r,
      /etc/hosts.deny r,
    
      /etc/mysql/*.pem r,
      /etc/mysql/conf.d/ r,
      /etc/mysql/conf.d/* r,
      /etc/mysql/*.cnf r,
      /usr/lib/mysql/plugin/ r,
      /usr/lib/mysql/plugin/*.so* mr,
      /usr/sbin/mysqld mr,
      /usr/share/mysql/** r,
      /var/log/mysql.log rw,
      /var/log/mysql.err rw,
      /var/lib/mysql/ r,
      /var/lib/mysql/** rwk,
      /var/log/mysql/ r,
      /var/log/mysql/* rw,
      /{,var/}run/mysqld/mysqld.pid w,
      /{,var/}run/mysqld/mysqld.sock w,
    
      /sys/devices/system/cpu/ r,
    
      # Site-specific additions and overrides. See local/README for details.
      #include <local/usr.sbin.mysqld>
    }
    

    So in order to enable MySQL to access a subdirectory of my $HOME I had to edit the file as root (sudo vi ...) and add this line to the list (I put it right under the /sys/devices line)

      /home/andreas/mysql/** rw,
    

    The apparmor man page explains the syntax and attributes in detail. For my purposes it suffices to know that ** stands for the directory and all subdirectories underneath and rw is of course read/write.

    Then this new profile needs to be activated replacing the old one via

    $ sudo apparmor_parser -rv /etc/apparmor.d/usr.sbin.mysqld
    Replacement succeeded for "/usr/sbin/mysqld".
    

    Finally running the MySQL program again did create the databases.

    Installing MySQL system tables...
    OK
    Filling help tables...
    OK
    
    To start mysqld at boot time you have to copy
    support-files/mysql.server to the right place for your system
    
    PLEASE REMEMBER TO SET A PASSWORD FOR THE MySQL root USER !
    To do so, start the server, then issue the following commands:
    
    ...
    

    Not knowing much about apparmor yet I wonder how one would go about to allow all users (on a bigger multi-user server) to use MySQL or any other application which is secured in the same way. It would be impractical to add all users home directories to the profile file so I guess there must be some shortcut. This needs more reading.

    Friday, August 2, 2013

    LibreOffice calc: automatically sort data upon data entry

    A common task in LibreOffice (or Apache OpenOffice) calc is to sort a range of cells via Data -> Sort... where the sort criteria (columns, sort order) are defined.
    If the spreadsheet is a living document where entries are deleted and new entries entered on a regular basis one would wish for this sorting to be done automatically rather than the user having to do it manually each time. In this article I show how to achieve this with macros in LibreOffice.

    The very basic idea of automation is to assign a macro to an event. In case that event happens the macro is being run.

    But before I get to that I'd like to outline the steps and how they are connected.

  • First define a range for the cells to be sorted
  • Then create the macro which will be triggered (it will make use of the range)
  • Assign the macro to the 'change content' event Now whenever the content of a cell is changed the macro will be triggered and run.

    Define a range

    Assume the data to be sorted are in two columns A and B. Currently I have only 4 entries but there could be more in the future. The columns also have a header in the first row.
    The range is set by
  • marking columns A and B
  • going to Data -> Define Range... and entering a name for the selection and finally clicking Add and OK. I chose the name 'MyData'.

    Create a macro

    It would suffice to create one macro but I opted to split the macro into two, one being of a more general reusable nature and the other more specific to the event.

    The first macro 'SortRange' sorts a range by its second column in descending order using the first row as header i.e. not part of the actual sort. The macro gets a range object as parameter and thus could be used for any range.

    Sub SortRange( oRange As Variant )     
    rem Sorts range 'sRange' by column 2 in descending order
    rem (assumes that columns have labels in first row)
    
    rem ----------------------------------------------------------------------
    rem define variables
    dim document   as object
    dim dispatcher as object
    rem ----------------------------------------------------------------------
    rem get access to the document
    document   = ThisComponent.CurrentController.Frame
    dispatcher = createUnoService("com.sun.star.frame.DispatchHelper")
    
    rem ----------------------------------------------------------------------
    rem Select the range
    dim args1(0) as new com.sun.star.beans.PropertyValue
    args1(0).Name = "ToPoint"
    args1(0).Value = oRange.AbsoluteName
    
    dispatcher.executeDispatch(document, ".uno:GoToCell", "", 0, args1())
    
    rem ----------------------------------------------------------------------
    dim args2(7) as new com.sun.star.beans.PropertyValue
    args2(0).Name = "ByRows"
    args2(0).Value = true
    args2(1).Name = "HasHeader"
    args2(1).Value = true
    args2(2).Name = "CaseSensitive"
    args2(2).Value = false
    args2(3).Name = "NaturalSort"
    args2(3).Value = false
    args2(4).Name = "IncludeAttribs"
    args2(4).Value = true
    args2(5).Name = "UserDefIndex"
    args2(5).Value = 0
    
    Rem Sort by the second column of the range !!!
    args2(6).Name = "Col1"
    args2(6).Value = oRange.RangeAddress.StartColumn + 2
    
    args2(7).Name = "Ascending1"
    args2(7).Value = false
    
    dispatcher.executeDispatch(document, ".uno:DataSort", "", 0, args2())
    
    End Sub
    
    Note how the Data -> Sort... Options are mapped to these properties and could be adjusted if one wanted different sorting criteria.

    The second macro 'SortRangeFilter' checks whether the change actually happened inside the range and then calls the SortRange macro. The name of the range is hardcoded in this macro and thus makes it inflexible but I couldn't find a better way (yet).
    Macros which are triggered by an event listener get passed a parameter which describes the source object. These can be different things which I need to differentiate in my code:

  • a single cell e.g. when entering a value
  • a range of cells e.g. when deleting a row
  • a set of ranges e.g. when marking and deleting two disjunct cells
    In the last cases my selection might contain cells which are not members of my defined range. In order to make my code the most flexible I apply the following logic:
  • a single cell is just a special case of range of cells thus I only need to differentiate two cases
  • for the remaining cases I determine the intersection of my named range with the selection (= source of the event). If it is empty there is nothing to do, otherwise I need to sort the range.

    Sub SortRangeFilter( oEvent As Variant )
    
    Dim sRange As String
    sRange = "MyData"
    Rem       ^^^^^^
    Rem       Hardcoded range name
    
    Rem Get the range object in order to access its boundaries
    Dim oSheet As Variant
    oSheet = ThisComponent.CurrentController.getActiveSheet()
    
    Rem Define an error handler in case the range name does not exist
    On Error Goto ErrorHandler
    Dim oCellRange As Variant
    oCellRange = oSheet.getCellRangeByName( sRange )
    
    Rem Check the type of 'oEvent'
    Rem Both support the 'queryIntersection' method
    If ( oEvent.supportsService( "com.sun.star.sheet.SheetCellRanges" ) Or _
         oEvent.supportsService( "com.sun.star.sheet.SheetCellRange" )) Then
      If oEvent.queryIntersection( oCellRange.RangeAddress ).count > 0 Then
        SortRange( oCellRange )
      Endif
    Endif
    Exit Sub
    
    ErrorHandler:
      Msgbox "SortRangeFilter: Range does not exist '" + sRange + "'"
      Exit Sub
    End Sub
    
    Note: rather than hardcoding the range name one could check all defined ranges for the current sheet and try to find the right one but there are a number of drawbacks:
  • a cell could be a member of several ranges (since ranges can overlap). Which range should be picked for sorting?
  • if multiple cells are selected (e.g. a row) there is an even higher chance of confusion. Some of the selected cells might be in range 1, others in range 2 etc. so which range is to be picked? And it is unlikely that all ranges need to be sorted.

    Both macros need to be entered in a macro library. I chose My Macros -> Standard -> Module1.

    Set event listener

    Now that the macro is in place I can set up the event trigger.
  • Right click on the sheet name and choose Sheet Events...
  • In the Assign Action window select Content changed and click Macro...
  • In the Macro Selector window navigate to (in my case) My Macros -> Standard -> Module1 and select SortRange in the list of macros and click OK
  • Back again in the Assign Action window click OK too

    Now you have it: any change in the range i.e. columns A or B will trigger a re-sort. Any other change on the sheet won't.
    If you create the range in a different place the sort will still be triggered.


    Below I'll show a couple of scenarios and how the macros behave. Assume there is a defined range 'MyData' somewhere on the spreadsheet, say C5:D10. The column headers have been entered in B5 and C5.

    Then the sheet event trigger needs to be assigned as described above and I can start entering the data.

    I begin with B6=A and C6=20. Nothing happens other than the named range being marked due to the macro.

    Then I enter B7=B and C7=34 and now the sort trigger already fires and sorts my columns and reverses the order.

    I enter another data set B8=C and C8=51
    And finally the last data B9=D and C9=40 which is moved up two rows.

    Always starting with the last setup I show various scenarios to delete cells and how the sort automatically kicks in.

    Mark a single cell and delete it
    Mark a row and delete it
    Mark some disjunct cells and delete them
    If you accidentally delete the range 'MyData' you get an error message

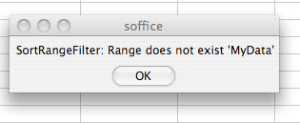
    Since my macro selects the data range it stays this way after the sort has finished. Of course this could be changed but I view it as an indicator that something happened, the viewer is visually attracted to the marked data range.